


Vault prolapse is a bothersome condition, as well as a challenge for the (uro)gynecologist. Different types of reconstructive procedures must be performed to correct the problem. We can combine extraperitoneal high uterosacral ligament suspension (HULS) using the cervix as a traction device while doing conventional vaginal hysterectomy for pelvic organ prolapse, which will prevent the vault prolapse (Pal et al 2019).
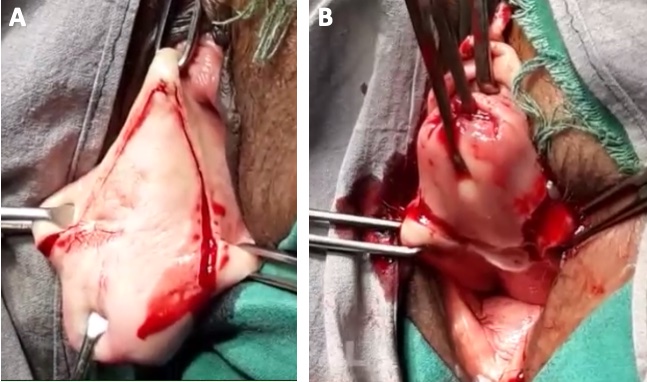
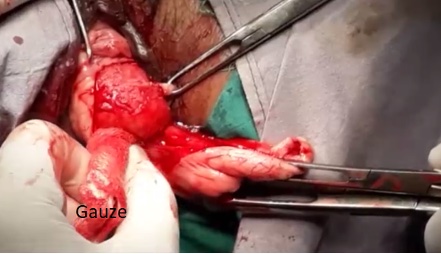
An inverted ‘V’ incision is made on the anterior vaginal wall. Vaginal mucosa is dissected off from the underlying vesicovaginal septum. The bladder is also separated from the uterus and pushed up. A semi-circular incision is made on the posterior vaginal wall which connects to the lower end of the inverted ‘V’ incision bilaterally. The posterior vaginal mucosa is dissected off from the rectovaginal septum. During this course, POD (Pouch of Douglas) may or may not open (Figure 1).
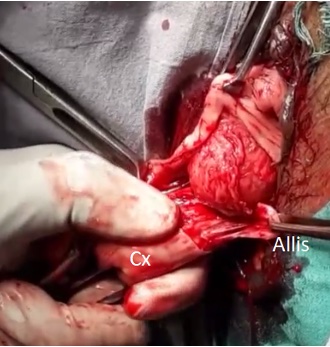
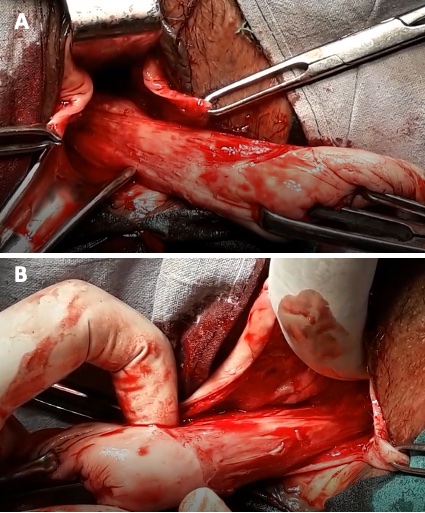
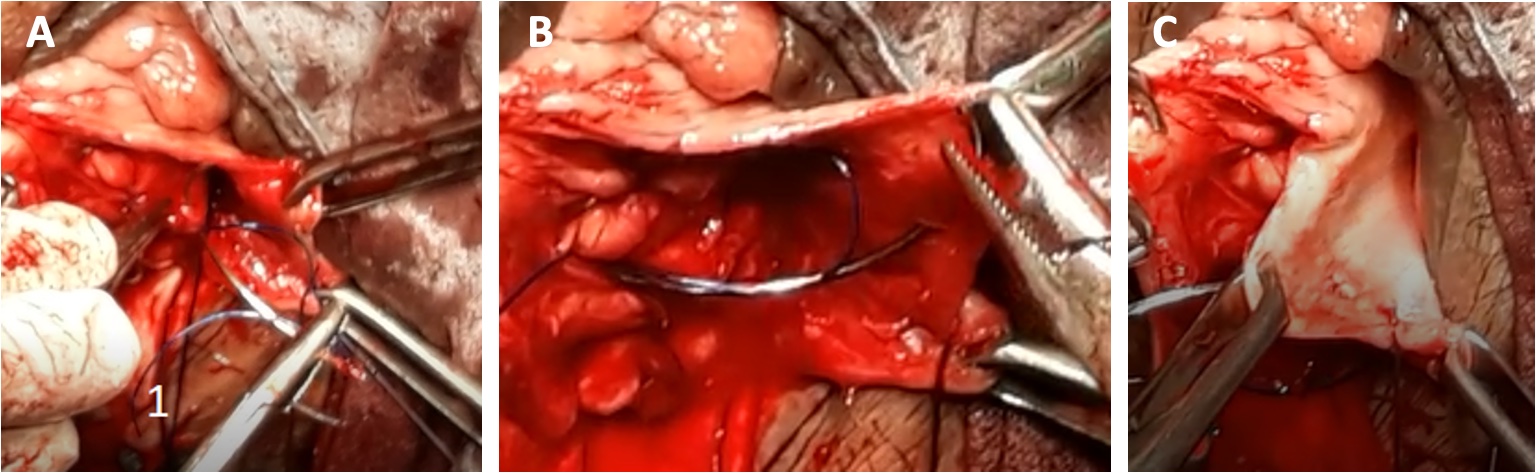
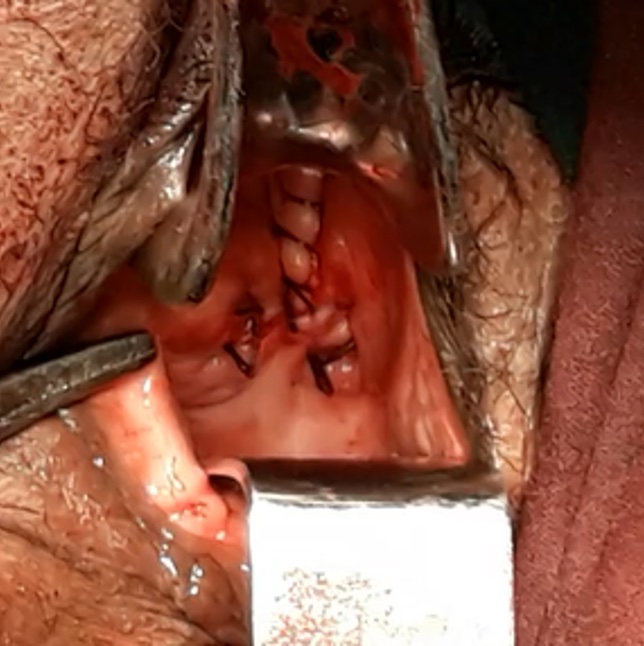
Landon retractor in the anterior pouch and Sims’ posterior vaginal speculum in posterior pouch are applied. The cervix is pulled outwards and to one side, for example to the right side of the patient (Pal et al 2020).2 The junction area of anterior and posterior incision at vaginal mucosa is caught by Allis forceps and pulled upwards laterally. A gauze piece is then taken, and the left lateral vaginal mucosa is pushed laterally upwards. This will expose the underlying cardinal-uterosacral ligament. The extent of the exposure should be as high as possible vaginally, so that the intermediate portion of the uterosacral ligament becomes available. Uterosacral ligament exposure on the right side is done similaryly (Figures 2, 3, 4A, 4B).
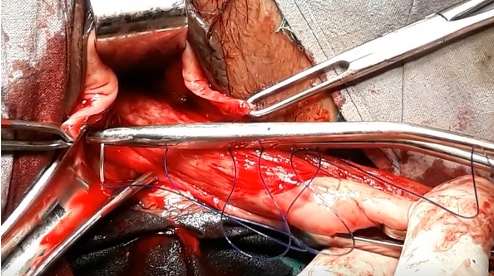
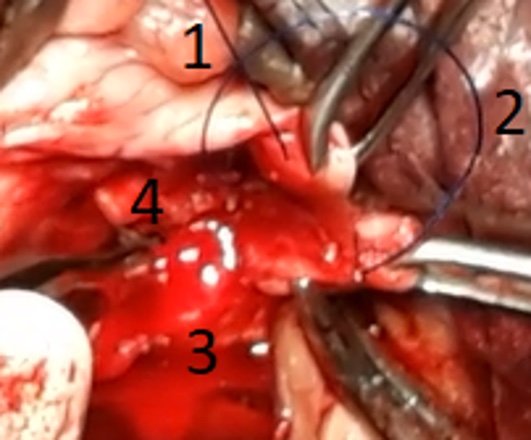
Landon retractor is pushed further upwards which will take the urinary bladder and ureters away from the operative field. Now polypropylene (non-absorbable) suture no. 1 or 1-0 is taken and a bite is applied through the left uterosacral ligament as high as possible by pulling the cervix outwards and to the right side. This cervical traction will make the procedure very easy. The needle bite does not encircle the ligament, it goes through it. The two ends of the polypropylene suture are left long and held with medium sized curved artery forceps. About 0.5-1 cm below the first HULS suture, a bite is taken in the left uterosacral ligament in the same way as described above with no 1-0 polyglactin (delayed absorbable) suture. Both the ends are kept long and held with medium sized straight artery forceps. Same thing is repeated on right uterosacral ligament – this time the cervical traction is applied outwards and to the left side of the patient (Figures 5,6).

Next, the conventional clamp of cardinal uterosacral ligament for vaginal hysterectomy is applied, dissected, and ligated with polyglactin 1-0 suture. End of the suture is kept long and held with mosquito forceps. The same thing is done on the other side. Holding the suture ends with different types of forceps will help you to identify them easily.
Vaginal hysterectomy is completed in the usual manner. Vesicovaginal septum is repaired.
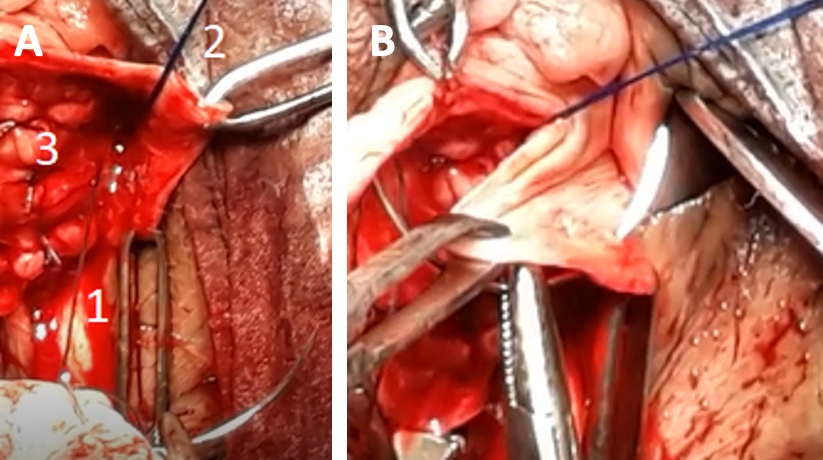
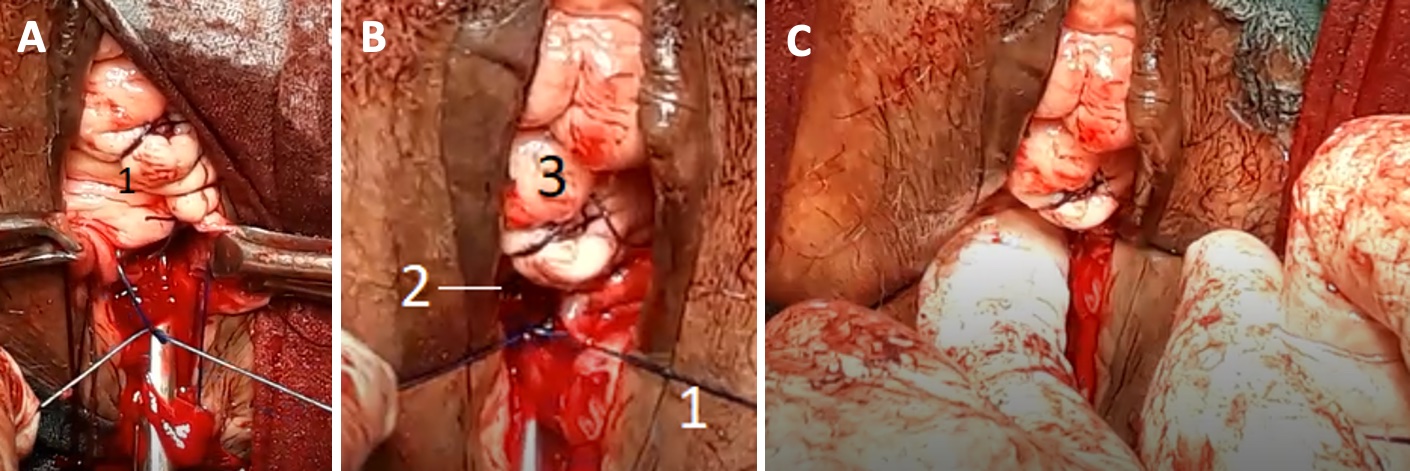
Vaginal hysterectomy’s conventional cardinal uterosacral ligament ligated suture end is eyed into a free needle and brought outside vaginal mucosa through the ipsilateral angle of the vault i.e., left suture end through left vault angle and held with mosquito forceps (Figures 7A, 7B).

Second HULS suture (polyglactin suture) has 2 limbs – anterior and posterior. With the anterior limb, bite is taken in the nearby repaired vesicovaginal septum and brought outside vaginal mucosa at the adjacent area. The end is held with straight artery forceps. With the lower limb, bite is taken through the rectovaginal septum and vaginal mucosa of the vault posterior lip to come outside the mucosa, medial to the conventional cardinal uterosacral ligament ligated suture. Both the ends are held with one straight artery forceps (Figures 8A, 8B, 9).
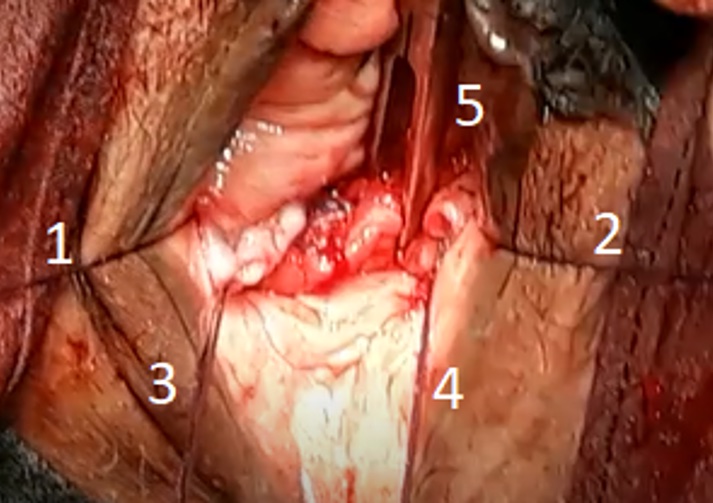
First HULS suture (polypropylene suture) also has 2 limbs – anterior and posterior. With the anterior limb, bite is taken at the area medial to the 2nd HULS suture placement on the repaired vesicovaginal septum, followed by bite at the adjacent vaginal mucosa medial to the 2nd HULS suture. Vaginal mucosa bite does not come outside the mucosa for polypropylene suture – end is held with curved artery forceps. With the lower limb, bite is taken at the rectovaginal septum medial to the 2nd HULS suture, followed by bite at the adjacent posterior vaginal mucosa at the vault but it does not come outside vaginal mucosa. Both the ends are held with one curved artery forceps (Figures 10A, 10B, 10C, 11)
Same procedure is done on other side.
Anterior vaginal mucosa is closed. Anterior and posterior limbs of respective 1st HULS suture (polypropylene) is tied to each other (5 knots). The knots are pushed towards tissue to prevent accidental cutting through of the suture as well as proper placement (Figures 12A, 12B, 12C).
The horizontal limb of vault is closed – end of the vault closure sutures are kept long. After vault closure, it can be seen that the polypropylene sutures are buried under the vault. Anterior and posterior limbs of respective 2nd HULS suture (polyglactin) are tied to each other (3 knots) by pushing the knot towards tissue. After tying both 2nd HULS suture, the vault angle suture is tied with the conventional cardinal uterosacral ligament ligated suture of ipsilateral side by pushing the knot – both sides completed. The end result is a high up vault with good vaginal length (Figures 13, 14).
Tips & Tricks:
Pal M, Bandyopadhyay S (2019). Modified extraperitoneal uterosacral ligament suspension for prevention of vault prolapse after vaginal hysterectomy. Int Urogynecol J. 30(4):633-637. doi: 10.1007/s00192-018-3669-4.
Pal M, Bandyopadhyay S (2020). Extraperitoneal uterosacral ligament suspension by using the cervix as a traction device. Int Urogynecol J. 31(8):1701. doi: 10.1007/s00192-019-04147-w.